Minimalist Install
Over the last few weeks I have shipped more than 100 BlueFlyVario's with GPS for installation on the Kobo Mini. I have shared a few of the install photos on the BlueFlyVario facebook page. If you have pictures and you want to share please let me know.
I have also refined my preferred install method. Instead of using the Dupont connector I prefer to wire the module directly to the Kobo. All of the steps I have previously blogged about still apply. This really just changes Step 4 in that process.
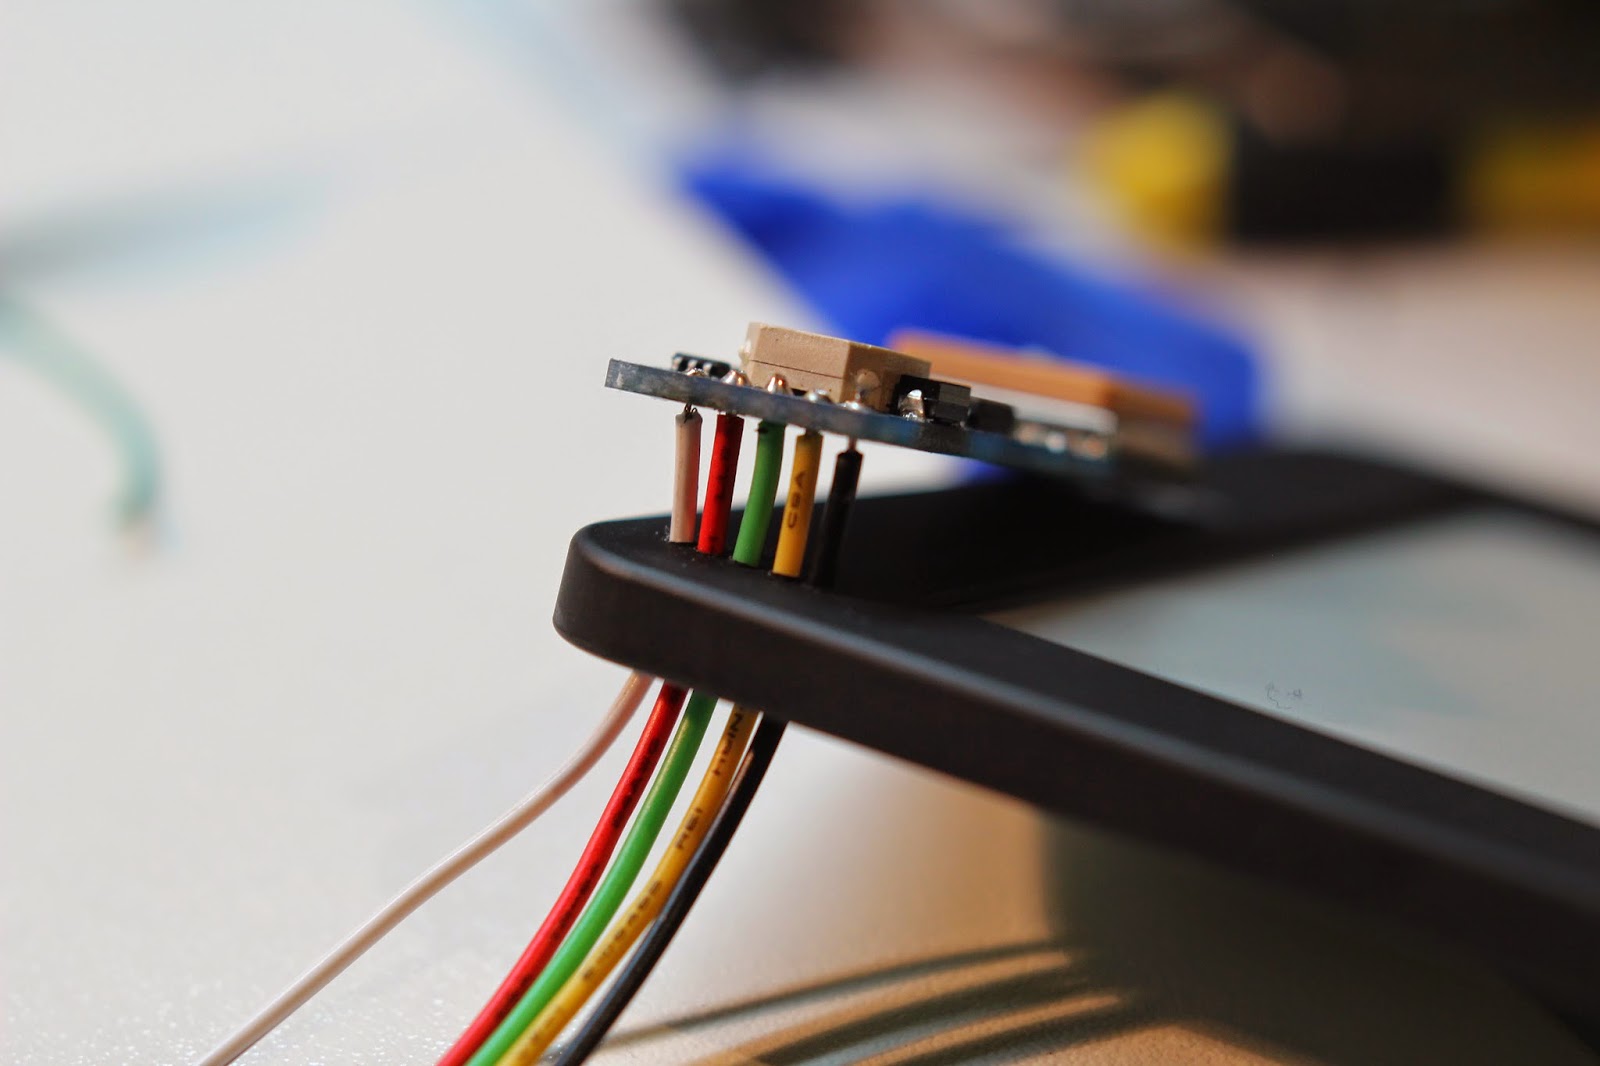
I start by placing the BlueFlyVario_TTL_GPS module on the front bezel of the kobo in the bottom right. Placement is pretty important, the holes in the board need to be in just the right position. In the image below you can see the bottom right corner of the module is just where the Kobo case starts to curve. The holes are about in the middle of the right bezel, and the bottom of the module is flush with the bottom of the Kobo.

After marking the hole locations I drill five 1.5mm holes from the front of the case (very carefully). Take care to avoid the plastic bits getting stuck in the Kobo. Five wires are soldered on to the module from the bottom and passed through the holes. If you plan to wire in VBACKUP for the GPS then make sure that wire is long enough to reach the test point near the positive terminal of the Kobo battery.
Simple Case
If you have left the heat shrink on, the module should work just fine if you glue it to the front of the bezel. However, some people wanted a more robust case so I designed a basic one in solidworks which is suitable for 3d printing.
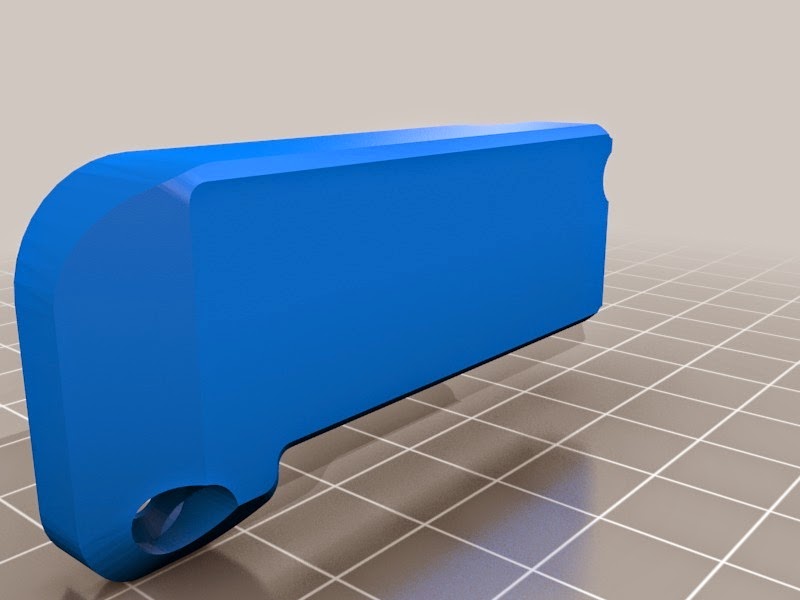
I have uploaded the design to Thingverse where you can download the STL file and use the 3d viewer to visualize the part. I printed this using blue PLA with a 0.35mm nozzle and 0.2mm layer height. The screws are M3 x 6mm countersunk with M3 Hexagon nuts. I place the case on top of the GPS on the bezel to mark the screw holes then drill with a 3mm bit. The hexagon nuts fit neatly in the inner part of the Kobo with a little plastic removal around the USB connector.

The final install is shown below. You can't see that the little piece of neoprene is still on the pressure sensor. It is important and you should not forget it. The case has a few internal parts to hold that neoprene in place.
I think it feels best when the XCSoar display is reverse portrait. The LED's are visible through the case. If you are a 3d printer person you will be a little critical of how well my first layer height is tuned. I will get better for future prints...

Over the last few weeks I have shipped more than 100 BlueFlyVario's with GPS for installation on the Kobo Mini. I have shared a few of the install photos on the BlueFlyVario facebook page. If you have pictures and you want to share please let me know.
I have also refined my preferred install method. Instead of using the Dupont connector I prefer to wire the module directly to the Kobo. All of the steps I have previously blogged about still apply. This really just changes Step 4 in that process.
I start by placing the BlueFlyVario_TTL_GPS module on the front bezel of the kobo in the bottom right. Placement is pretty important, the holes in the board need to be in just the right position. In the image below you can see the bottom right corner of the module is just where the Kobo case starts to curve. The holes are about in the middle of the right bezel, and the bottom of the module is flush with the bottom of the Kobo.
After marking the hole locations I drill five 1.5mm holes from the front of the case (very carefully). Take care to avoid the plastic bits getting stuck in the Kobo. Five wires are soldered on to the module from the bottom and passed through the holes. If you plan to wire in VBACKUP for the GPS then make sure that wire is long enough to reach the test point near the positive terminal of the Kobo battery.
Simple Case
If you have left the heat shrink on, the module should work just fine if you glue it to the front of the bezel. However, some people wanted a more robust case so I designed a basic one in solidworks which is suitable for 3d printing.
I have uploaded the design to Thingverse where you can download the STL file and use the 3d viewer to visualize the part. I printed this using blue PLA with a 0.35mm nozzle and 0.2mm layer height. The screws are M3 x 6mm countersunk with M3 Hexagon nuts. I place the case on top of the GPS on the bezel to mark the screw holes then drill with a 3mm bit. The hexagon nuts fit neatly in the inner part of the Kobo with a little plastic removal around the USB connector.
The final install is shown below. You can't see that the little piece of neoprene is still on the pressure sensor. It is important and you should not forget it. The case has a few internal parts to hold that neoprene in place.
I think it feels best when the XCSoar display is reverse portrait. The LED's are visible through the case. If you are a 3d printer person you will be a little critical of how well my first layer height is tuned. I will get better for future prints...